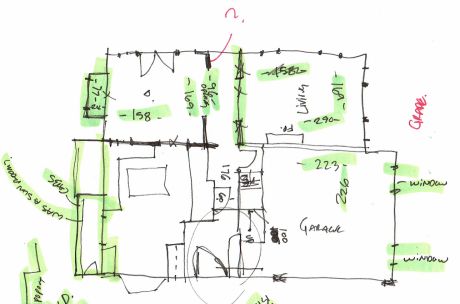
Step 1 - THE OVERALL - Note red notes to myself, and area that is circled.
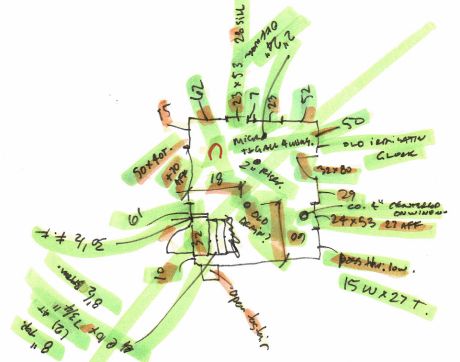
Step 2 - THE SPECIFIC Note items are highlighted out in two colors. My drafter had one color, I had another.
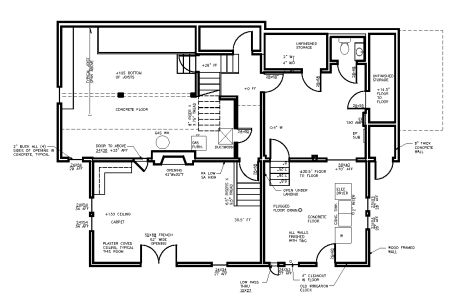
Step 5 - ENTERED IN CAD
how i do interior as-builts
october
9, 2015 simple
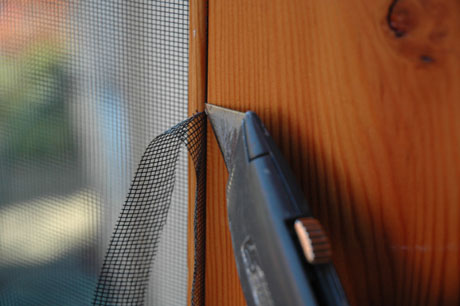
screen doors october
14, 2013 The
frames are all glued up with biscuits
at the corners - like simple frames.
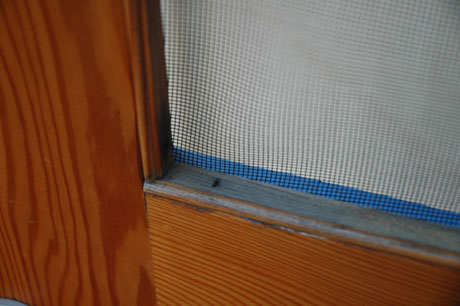
Painted on the outside, clear
sealed on the inside. The material
is 1" thick to accomodate
the narrowest lock mechanism I
could find. The
screens are stopped in with dainty
wood trim held in place using
a pin nailer - stretching the
screen tight as you go. Excess
trimmed off. They
survived two years of children
pushing on the lower panel before
we had to reinstall the screen.
Not to bad.
I do quite a bit of projects that start without drawings, and need a
good base before design starts. That means going to into the field
for a day recording measurements for an entire building, then taking the info back to the
office to draw up proportionally in cad. I'm generally accurate within 2".
Going back to the jobsite repeatedly is a waste of time and client fee, so
getting all the info the first time is important to me.
I record all my measurements in inches, no fractions,
measured to the wall, not the trim.
Feet is always apprebreviated FT.
6 and 9 are underlined. (Is it 191 or 161?)
BEFORE I start, I photograph EVERY room's wall, ceiling, and floor. It
helps to have a photo to look back on for misc details.
Step 1 - THE OVERALL. Draw up a sketch of the overall
floor level. It can be loose and sketchy with mistakes scribbled out. We're
collecting data here, not making art.
a. Get some overall dimesions all
the way across the building, wherever possible.
b. Dimension each room's length and width.
c. Get each rooms
ceiling height.
Step 2 - THE SPECIFIC. On a new sheet of paper, draw
up the perimeter walls of the space or room, and measure each wall segment
and door segment. I measure to the inside of interior window jambs and the
leaf of each door. Each room gets its own sheet of paper.
Step 3 - THE DETAILS. Add misc. details to each room,
floor and ceiling registers, outlets, switches.
Step 4 - ASSEMBLIES. Measure a couple pieces of trim,
siding, the width of door jambs, some sill heights, ceiling and floor tile.
Step 5 - ENTERING IN CAD. I start with my overall
drawing and get the proportions right, and then fill in the detail. If its
within 2", I feel like I'm doing really good.
a. as you work, highlight
off each dimension that has been entered. If its suspect, circle it in a
separate color.
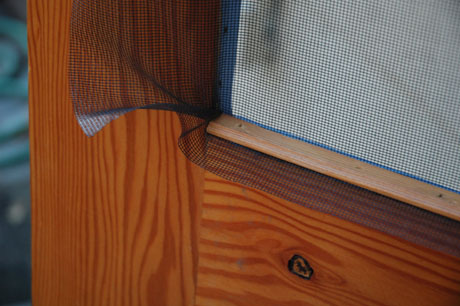

After looking around a screen
doors, I decided to make my
own out of some of the fir framing
from my own house remodel.